A pad is one song, one sound effect, one cue. Everything it does when you tap it is decided here, in one long dialog, at home, with time.
This page walks that dialog from top to bottom in the order the app shows it, so you can read it with the phone in your hand and follow along.
Opening the settings
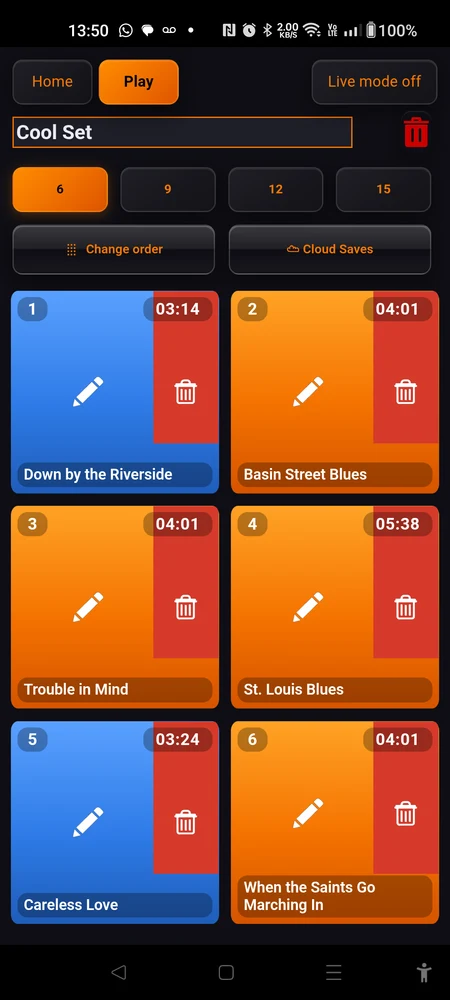
On a set, the button at the top says “Edit”. Tap it, and the pads change job: they stop playing and start editing.
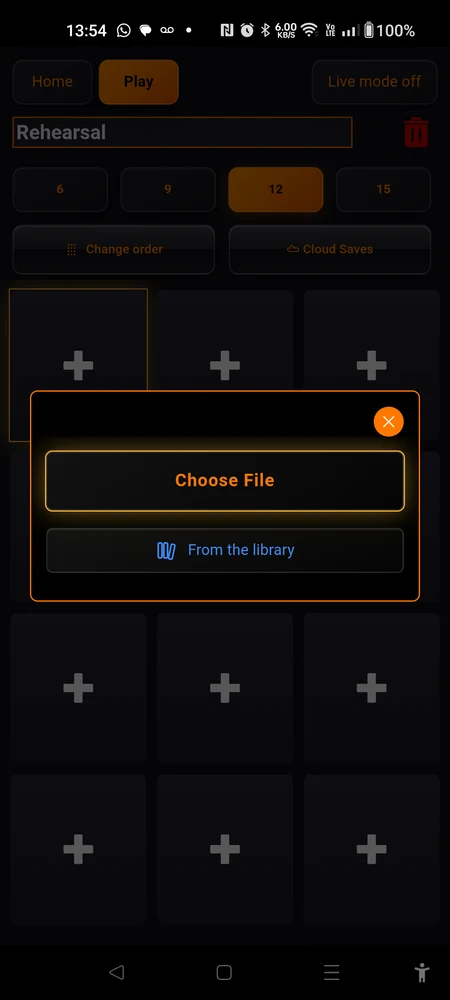
Now tap a pad. If it already has a song, its settings open. If the slot is empty, the same dialog opens with almost nothing in it: only the buttons that put a file there. Fill it, and the rest of the dialog appears.
Tap “Play” to leave Edit mode. On stage, live mode hides the “Edit” button altogether, so there is no way to open a pad’s settings by accident during a set.
Nothing to save
Every change is saved the moment you make it. There is no OK button and no Save button on this dialog, because there is nothing waiting to be confirmed. Move a slider, and the pad has already changed.
So you leave by closing: the cross at the top of the dialog, or a tap outside it. Nothing is lost by closing, and nothing is applied by closing either. It was applied when you did it.
The full-screen editors are the one exception. The boundaries editor, the lyrics editor and the score editors each have their own “Save”, because in those you are making one deliberate edit rather than turning switches.
What the pad itself tells you
Before you open anything, the pad is already talking to you.
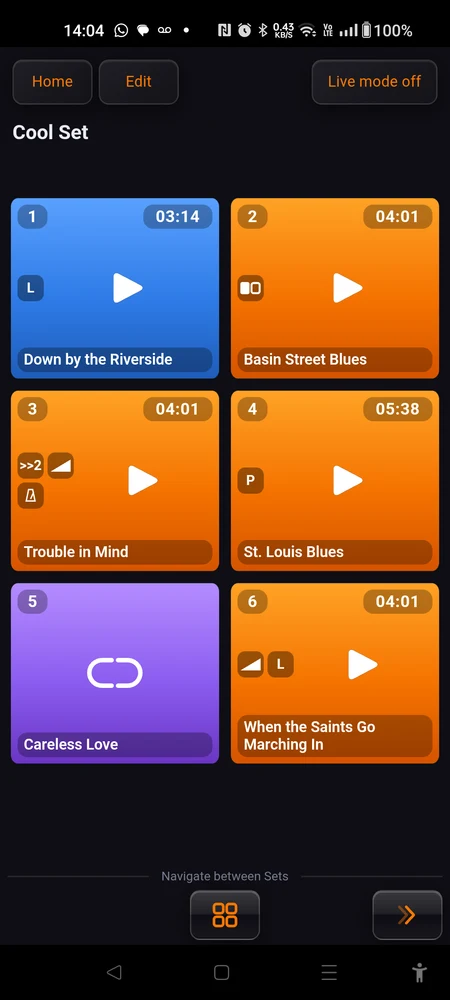
Its colour says where the recording lives. Orange is a pad with its own file. Blue is a pad playing a shared library title. Purple with a broken link is a pad whose title has been removed from the library: it keeps its name so you know which one went missing, and it has nothing left to play.
Red means playing. The same red for every pad, whatever it holds, so what is sounding right now is never in doubt.
The slot number sits top left. That is the number you use when you chain one song to another. The clock sits top right: total length when the pad is idle, time remaining while it plays.
Small badges fill the middle of the pad. They describe how the pad is set up:
| Badge | Meaning |
|---|---|
>> and a number | Chains into that slot when it ends |
| A metronome | Has a count-in |
L or P | Opens lyrics (L) or a score (P) on stage |
| Bars | It is a “Sound Fx” pad |
| Two blocks | It plays two audio sources |
| A ramp | It has a fade |
They are drawn in that order of importance, and on the tightest grid, the one with fifteen slots, only the first two fit. There is no room for six badges on a pad that is eighty pixels tall, and a texture of tiny symbols is not information.
All the badges disappear in live mode. How a song is configured is a question for the rehearsal room. On stage the pad has one job: say what it is, and whether it is playing.
The file, and the pad’s name
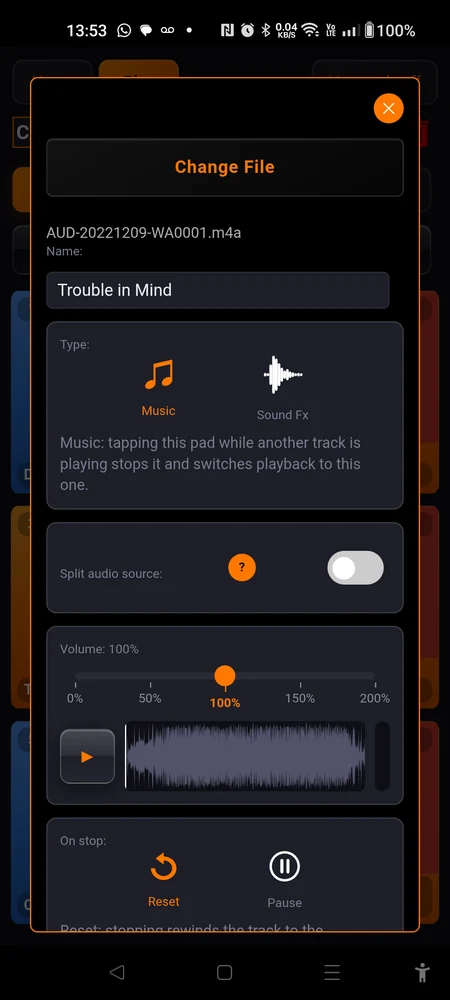
The big button at the top is “Choose File” on an empty slot and “Change File” once there is something to change.
The picker is filtered to audio, so it will not offer you photos and videos for a slot that can only take sound. MP3, M4A and AAC, WAV, AIFF, FLAC, OGG and Opus, WMA and CAF all go in.
The file is copied onto the phone. Nothing streams, ever, so once the import is done the app has no further use for the internet. The pad takes the file’s name, which you can then change to whatever you actually call the song.
Some studio bounces cannot be played by Android as they are: 24-bit, 32-bit and floating-point WAV, and AIFF. Those are rewritten as 16-bit WAV on import, at the same sample rate and with the same channels, and the app tells you it has done it. It happens once, at your kitchen table, rather than failing on stage.
Under the button you see the original filename, greyed out and not editable. It is there so you can tell two similarly named exports apart. “Name:” below it is the name that shows on the pad, and it is yours to set.
From the library
On an empty slot, and only if your library already holds at least one title, a second button appears: “From the library”. It points this pad at a recording the library owns, which any number of sets can play at once.
A pad is either its own file or a library title, and that is decided once. There is no switch between the two later. If you want a library pad to become an independent copy, that is what “Deep copy to a set” at the bottom of the dialog is for.
On a blue pad the name belongs to the title, not to the pad, so change it from the library and every set follows.
Type: Music or Sound Fx
“Type:” has two settings, and it changes how the pad behaves more than anything else in the dialog.
“Music” is a backing track. Only one music track plays at a time: tapping a music pad while another one is playing stops that one and switches to this one. That is what you want for a setlist, where the next song replacing the last one is the whole point.
“Sound Fx” plays on top. Tap it while a track is running and it sits over the track. Tap three of them and all three sound together. That is what you want for a door slam, a phone ringing, thunder.
Two consequences worth knowing before you choose:
- A Sound Fx pad has no count-in. The whole block disappears from the dialog. A thunderclap does not need counting in.
- A Sound Fx pad never opens its lyrics or its score by itself. You can still open them by hand from the set, but the app will not throw a document on screen because an effect fired.
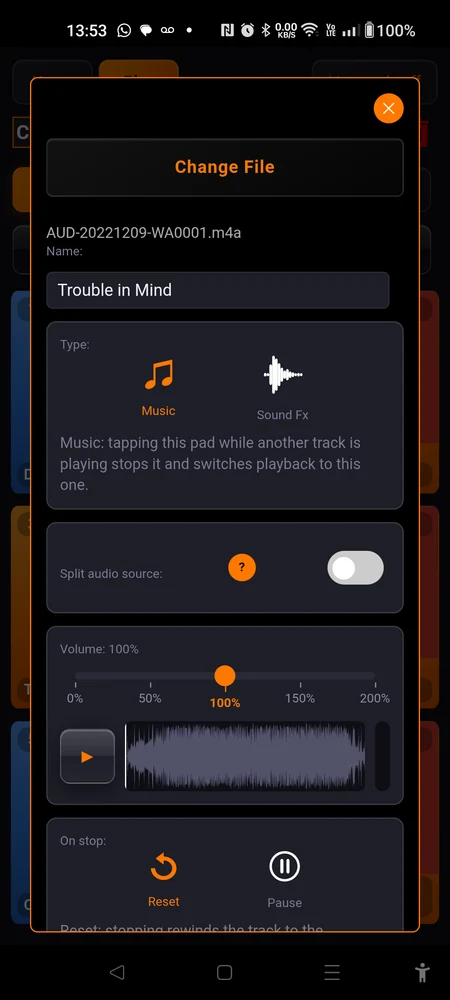
Split audio source
“Split audio source:” turns one pad into two independent sources, one per ear, with a level each. It is how you send a click to the drummer’s in-ears and the track to the room, from a single phone.
It has a page of its own: Two sources in one pad. Everything below on this page assumes a pad with a single source, and where a setting behaves differently with two, it is called out.
Volume
“Volume: {n}%” runs from 0 to 200%. Above 100% is a boost, which is useful for a track that was bounced quietly, and which will not help a track that was already loud.
The slider works while the song plays. Move it during a rehearsal, hear the change immediately, and the pad keeps the new level for next time. This is the one setting worth adjusting with the band in the room rather than in the quiet.
Under the slider sits a small waveform of the track. Tap it anywhere to jump to that point, use the play button beside it to audition, and watch the level meter next to that. The waveform’s height follows the slider, so you can see the boost as well as hear it.
On a pad playing a library title the label reads “Level (this set only)” instead. The level is the one recording setting each set keeps for itself, because the same song can need more push in a loud room than in a quiet one.
The whole block is hidden on a two-source pad. Each source has its own level there, and a master on top of them would be a third volume control for the same sound.
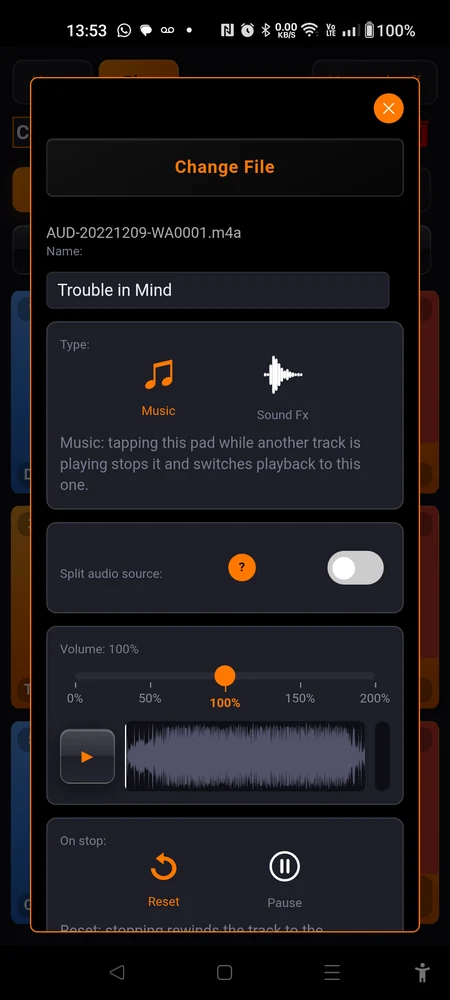
On stop: Reset or Pause
“On stop:” decides what a second tap does to a track that is already playing.
“Reset” rewinds. Stop the song, and the next tap starts it from the beginning. This is what you want for a set, where a song you abandoned is a song you will start again from the top.
“Pause” keeps the position. Stop the song, and the next tap picks up exactly where you left off. This is what you want for a long atmosphere or a rehearsal track you keep interrupting.
Two things about resuming from “Pause”:
- The count-in does not run again. You are already in the song. Four clicks in the middle of a piece would be four clicks the audience can hear.
- The fade-in does apply again. Coming back in from silence at full level is abrupt, so if you set a fade-in, you get it on the way back too.
A paused pad also grows a reset area on its right-hand side. Tap that instead of the pad itself and the song goes back to zero without playing, which is how you abandon a half-played track without hearing the top of it again.
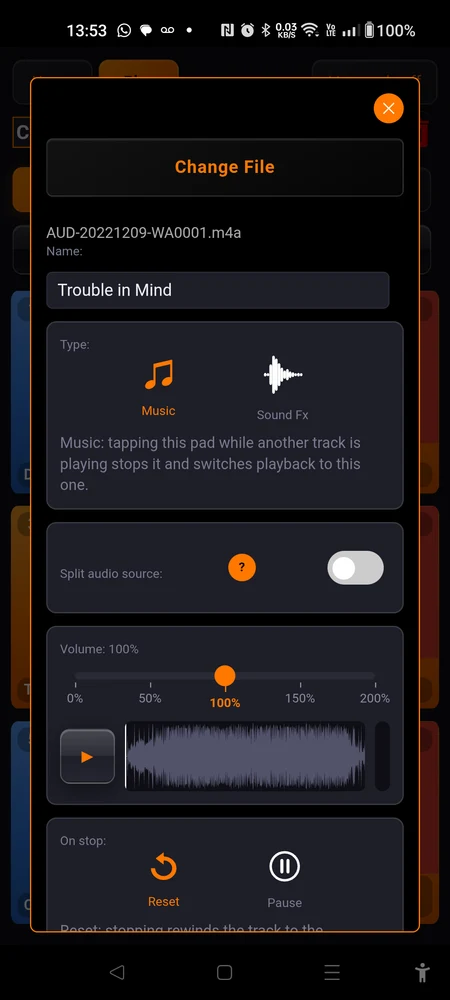
Audio Boundaries
Most tracks have dead air at the front. “Audio Boundaries:” is where you cut it off, so the tap and the downbeat are the same moment.
Turn the switch on and two buttons appear: “Edit” and “Reset”. Once you have actually moved something, a line underneath reports where the bounds now sit, in seconds.
Note what happens to the switch as soon as a bound has moved: it disappears, and the block stays open. This is deliberate. A trim that is cutting thirty seconds off a song must never be able to hide behind a switch you turned off months ago and forgot. “Reset” puts the bounds back to the whole file, and the switch comes back with them.
The boundaries editor
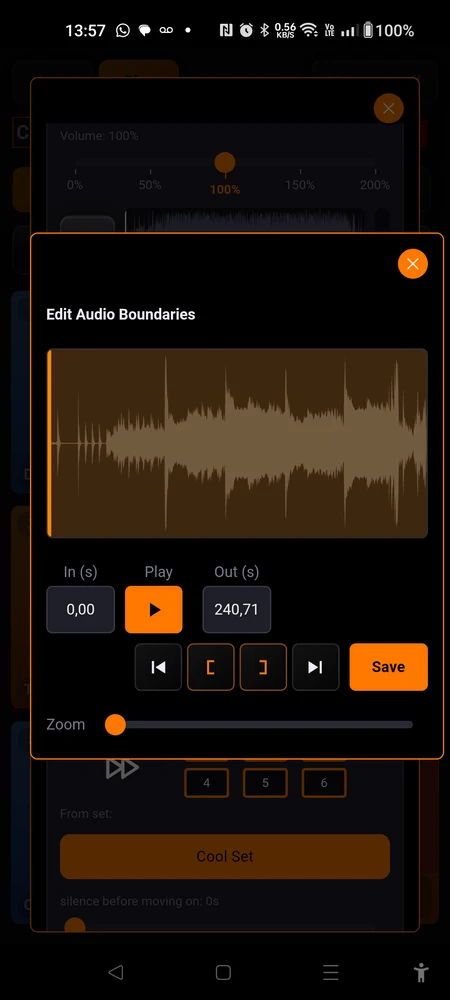
“Edit” opens a full-screen editor titled “Edit Audio Boundaries”.
Across the top are “In (s)” and “Out (s)”, typed in seconds to two decimals, with a play button between them that auditions the region you have marked. Below them, four buttons jump the view: “Track start”, “In marker”, “Out marker” and “Track end”. A “Zoom” slider stretches the waveform out when you need to place a marker on a particular beat rather than roughly.
“Save” applies the trim and closes the editor. This editor is the exception to everything-saves-as-you-go: nothing is applied until you save.
Opening this editor stops whatever the app was playing. It has to. The editor previews audio through the browser engine while the pads play through the phone’s native one, and the two do not negotiate the speaker between them, so both playing at once would just double up.
The whole boundaries block is hidden on a two-source pad. There, each source is trimmed separately, and a third set of bounds over the assembled mix would only muddy the picture.
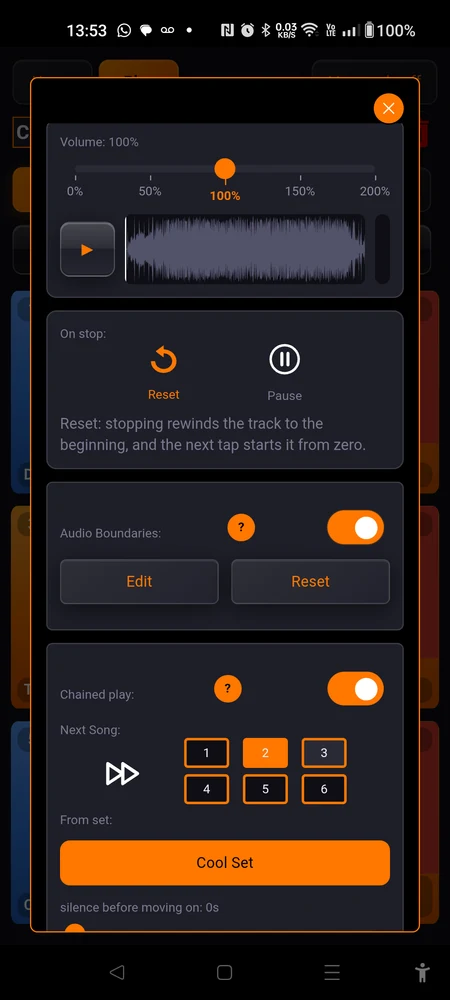
Chained play
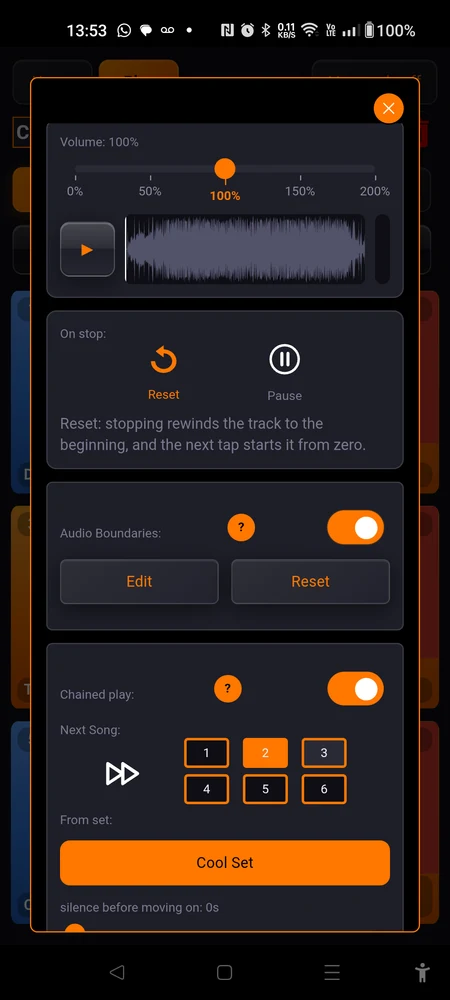
“Chained play:” is how a set runs itself. One song ends, the next one starts, without anybody reaching for the phone.
Turn it on and you get three things.
“Next Song:” is a grid of slot numbers. Tap the number of the pad that should follow this one. Your own slot is marked in the grid so you can see where you are counting from.
“From set:” names the set that number belongs to. It defaults to the set you are in, which is what you want almost always. Choose a different set and the app will follow the music into it: when the chain fires, the screen switches to that set with the next song already playing. That is how a show in three parts becomes three sets that run into each other.
“silence before moving on: {n}s” holds up to 20 seconds of nothing between the two songs. Zero runs them together. Three or four gives you room to say something between numbers without the next track arriving over the top of it.
When the chain fires, and when it does not
The chain fires when the track reaches its end. That is the only thing that triggers it.
It does not fire when you tap the pad to stop it. Pressing stop is the musician ending the song, which is a different act from the song finishing, and starting the next one on top of that decision would be exactly wrong. “Stop all” does not chain either, for the same reason: it is the panic button.
A fade-out counts as reaching the end. When the fade completes the song stops, and if it is chained, the next one starts.
Pre count
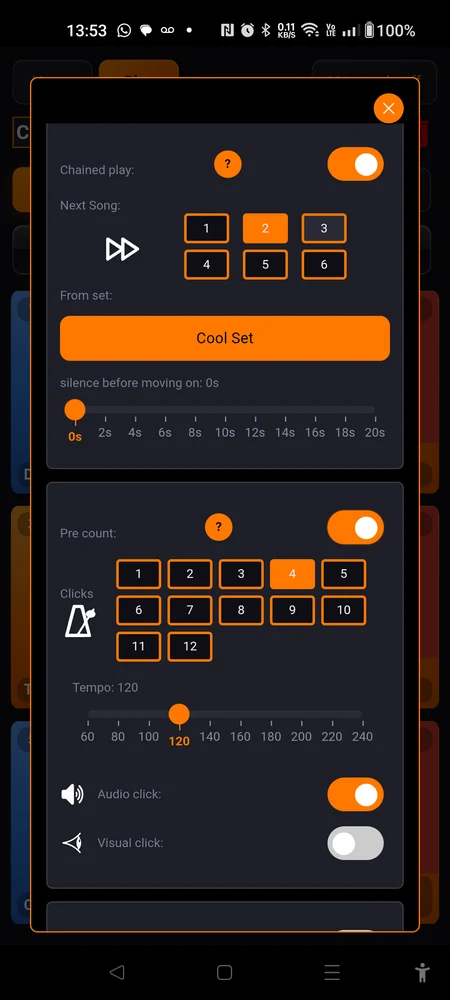
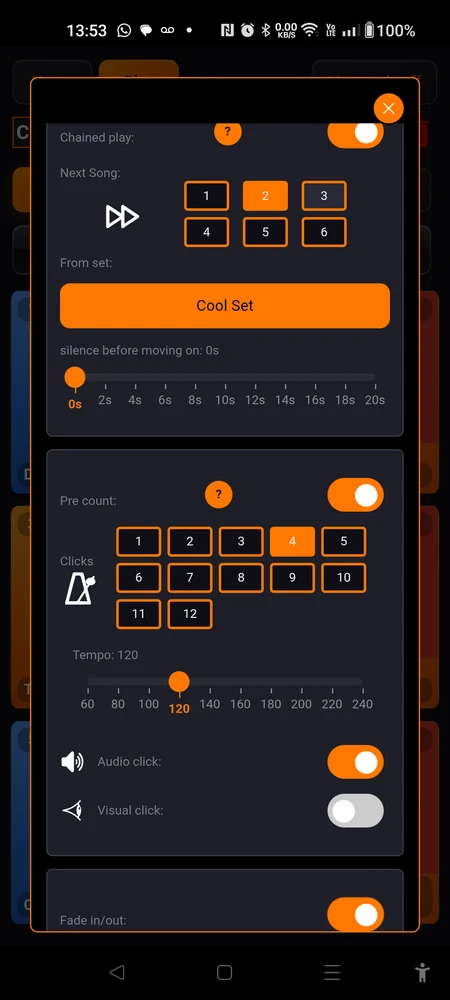
“Pre count:” clicks the band in. It is offered on “Music” pads only.
“Clicks” is how many, from 1 to 12. Four is a bar.
“Tempo: {n}” is how fast, from 60 to 240 BPM. Set it to the tempo of the track, not to something comfortable to count, or the clicks and the music will not agree.
“Audio click:” puts the clicks in your ears. “Visual click:” puts a big number on the screen for each one, which is what you want when the click cannot be in the monitors. Turn the visual click on and a third switch appears: “Reverse countdown:”, which counts 4-3-2-1 down to the start instead of 1-2-3-4 up to it.
The music comes in one beat after the last click. A four-click count-in goes 1-2-3-4, and the band plays on the next beat. That is how a drummer counts a band in, and it is why you do not need a fifth silent click to make room for the downbeat.
The count-in runs when you start a song from a stop. It does not run when you resume a paused pad, and it does not run when you jump to a position: in both of those you are already inside the song.
On a pad that plays a library title, the tempo is shared with every other pad playing that title. Change it here and you have changed it in every set. The number of clicks, the audio click, the visual click and the reverse countdown all stay on this pad, where you would expect. The tempo does not, so check the other sets before you nudge it.
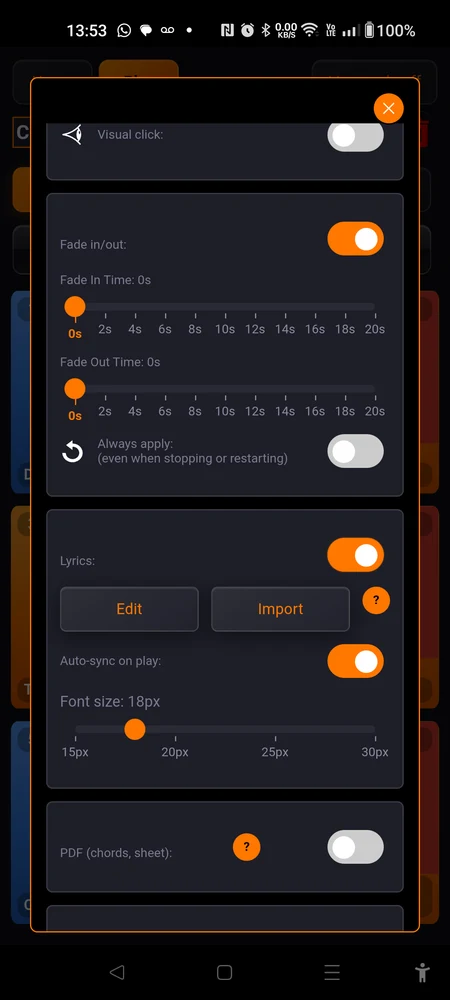
Fade in/out
“Fade in/out:” gives you “Fade In Time: {n}s” and “Fade Out Time: {n}s”, both from 0 to 20 seconds.
The fade-in applies every time the track starts. That includes resuming a paused pad and jumping to a new position, so there is no version of starting this song that arrives at full level.
The fade-out starts by itself. The app watches the time remaining, and when there is less of it left than the fade-out is long, the fade begins. You do nothing. When it reaches silence the song stops, and if the pad is chained, the next one starts on schedule.
That last part is what makes a fade-out useful for a set rather than just tidy: a long track can be brought down and handed over without anyone counting bars.
Lyrics and scores
“Lyrics:” holds words, typed or imported, which scroll themselves as the track plays. “PDF (chords, sheet):” holds a chord chart or a score, which turns its own pages.
The two are mutually exclusive. Turning one on turns the other off. A pad shows one document on stage, because a phone has one screen and a set has no time for a choice.
Both have more depth than fits here: timestamps, page-turn markers, cropping, font size, auto-sync. They live on their own page: Lyrics and scores.
If you need to build a chord chart in the first place, Chord Analyser does it for free and exports the PDF: /apps/chord-analyser.
Inter-Sets
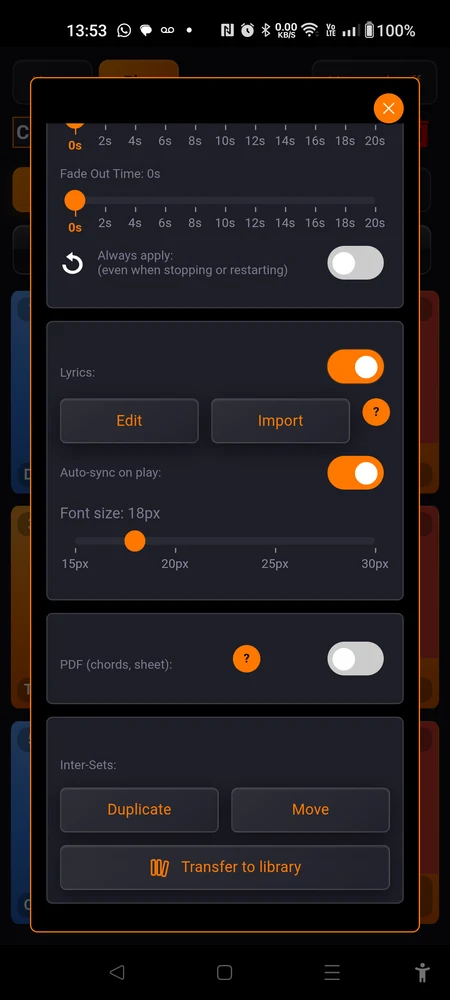
“Inter-Sets:” is the bottom of the dialog, where a pad moves house.
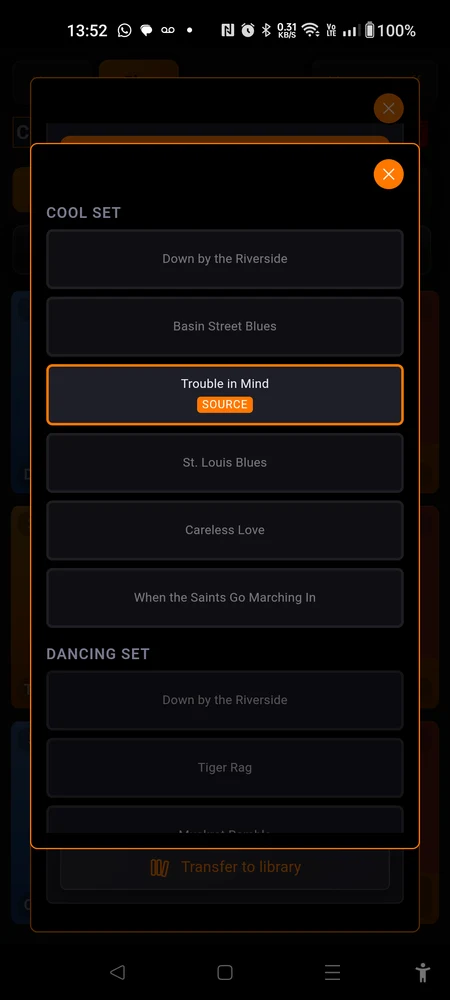
“Duplicate” and “Move” both open the same picker: every set, every slot, with the occupied ones greyed out. Pick an empty slot and confirm. Duplicate leaves the original in place; Move empties it.
The audio file is shared, not copied. The app stores a recording by its contents, so a duplicate points at the same file rather than making a second one. Two copies of a forty-minute track cost you forty minutes of storage, not eighty, and a set you back up does not upload bytes the cloud already has.
“Transfer to library” moves this pad’s recording into the shared library and leaves the pad playing it from there. The recording, its bounds, its mix, its lyrics and its score all go; the pad keeps its type, its level, its count-in and its chaining, and goes on playing exactly as it did. The button only appears when your plan has room for another title, because a button that explains it cannot work is worse than no button. See The shared library for what that plan allows.
“Deep copy to a set” appears only on a pad that already plays a library title. It makes an independent copy in another slot: same audio, but its own settings, following nothing. This is the escape hatch for when one set wants a title trimmed differently from all the others.
Deleting a pad
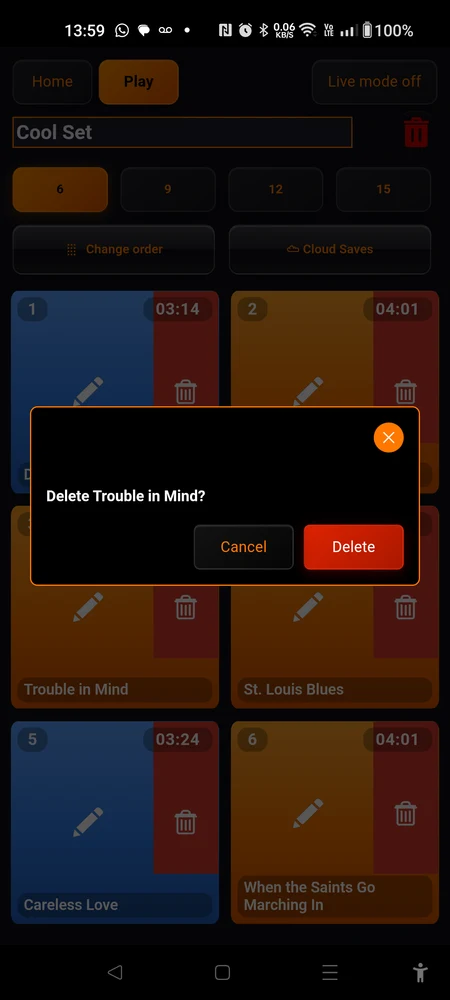
In Edit mode, the right-hand part of every filled pad is a red delete area. Tap it and the app asks first, with the song’s name in the question.
Deleting empties the slot and deletes the audio file, unless another pad still uses it. Your cloud backups are untouched, so a set you have saved can be restored. A song you imported and never backed up is gone.
Where to go next
Two sources in one pad if you need a click in the in-ears and the track in the room.
Lyrics and scores for words and charts that follow the music by themselves.
The shared library if the same song turns up in more than one set and you are tired of setting it up twice.
And Good habits, which is not about settings at all. It is about how the people who gig with this app every week actually lay out a show.